


When it comes to your Shopify store, most people obsess over hero banners, product pages, and checkout flows, but what about the humble footer? Well, that often overlooked strip at the bottom of your site does more than sit there looking like a footer.
A well-designed footer helps guide visitors, build trust, showcase your brand, and can even drive conversions (yes, really). In this blog, we’ll show you how to customize your Shopify footer, ensuring it not only functions properly but also looks great.
What is Shopify Footer?
The Shopify footer is the bottom-most section of your online store, the digital “last stop” for visitors scrolling through your site. While it may not get as much attention as your homepage banner or product gallery, the footer plays a surprisingly powerful role in both navigation and conversion.
In Shopify, the footer comes as a default part of every theme and can be easily edited to suit your store’s design and goals. Whether you're using a free theme or a custom-built masterpiece, your footer is a key place to build trust and keep your store looking polished from top to bottom, literally.
Shopify Footer Default Elements
By default, Shopify themes include a package of various footer components, designed to make browsing your store more convenient and accessible, and to help you discover important information and build confidence in your company. Though your layout and styling needs may differ according to your theme, most Shopify footers possess the following fundamental elements:
- Add quick navigation links, such as About Us, Contact, FAQs, Shipping & Returns, Privacy Policy, and Terms of Service, to help visitors quickly find key information.
- Include a newsletter signup form to collect emails and convert visitors into subscribers.
- Display social media icons linking to Facebook, Instagram, TikTok, Pinterest, and other platforms to extend your brand presence beyond your website.
- Provide clear contact information, such as a phone number, email address, or store address, to establish trust and ensure customer support.
- Display payment method icons (e.g., Visa, Mastercard, PayPal, Apple Pay) to enhance trust and minimize checkout hesitation.
- Add trust badges or security certifications (e.g., SSL, McAfee, Norton) to assure shoppers that your site is secure.
- Decide whether to keep, remove, or customize the default “Powered by Shopify” text to match your brand.
- Include a copyright notice with the current year and store name, usually auto-generated by your Shopify theme.
Why customize your Shopify Footer?
If you’ve ever treated your footer like an afterthought, you’re not alone. However, in reality, customizing your Shopify footer is one of the smartest and easiest ways to enhance your store’s user experience, establish credibility, and drive conversions without affecting your homepage.
- Improve user experience and navigation: Adding key links, such as FAQs and Returns, to your footer helps customers find information quickly and stay engaged.
- Reinforce branding and trust: A branded footer with matching colors, fonts, and logos builds consistency, while trust badges and payment icons boost confidence before checkout.
- Increase conversions and newsletter sign-ups: Use your footer to capture leads with a newsletter signup form and a strong CTA like “Get 10% off your first order!” It turns casual visitors into future customers.
- Comply with legal requirements (links to policies, terms): Some links, such as the Privacy Policy, Terms of Service, and Accessibility, are legally required; placing them in your footer helps ensure compliance.
Basic Shopify Footer Customization (Using Theme Customizer)
Luckily, you don’t have to be a developer (or even know a single string of code) to make a good-sounding, neighbor-gushing, Shopify footer. In many modern themes, (particularly, premium themes), you will get built-in customization choices that might allow you to fast and graphically modify your footer. Kalles is one of the most popular and unchanging themes of it.
Kalles is one of the best Shopify themes with a smooth design and multiple customization options, such as the outstanding footer builder feature. With Kalles, you can easily create multiple columns, add custom content blocks, embed social media, include trust badges, and drag-and-drop newsletter forms, no developer required.
Here’s a step-by-step guide to customizing your footer using the Shopify Theme Customizer, specifically with the Kalles theme:
Step 1: Access the Theme Customizer
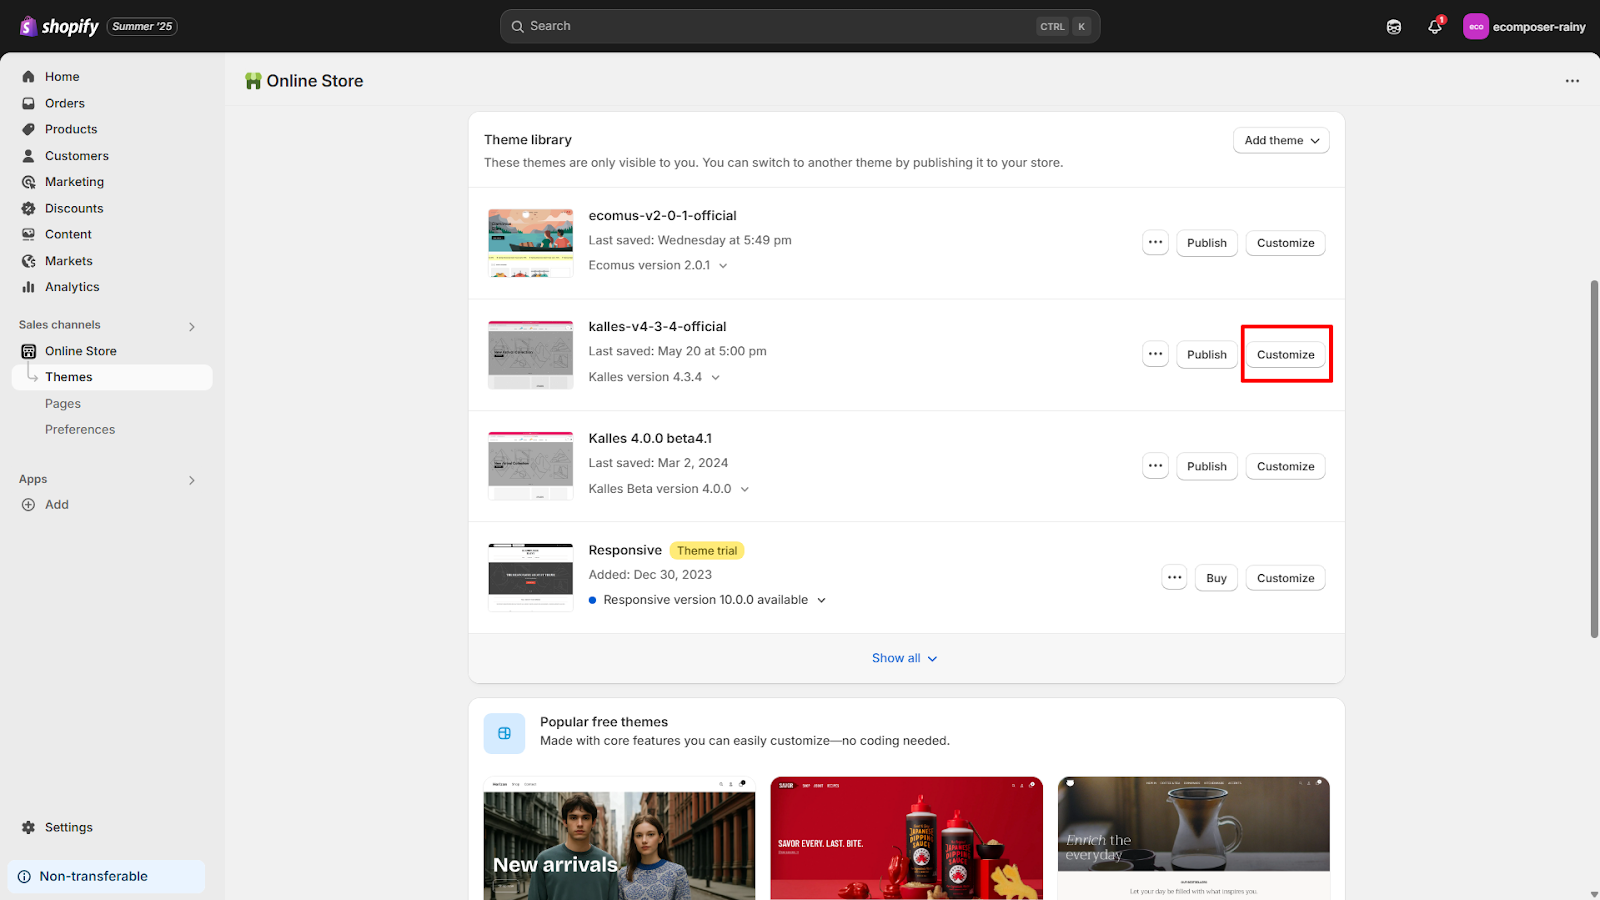
- Navigate to Online Store > Themes from your Shopify administrator.
- Find your published theme (e.g., Kalles), then click Customize.
Step 2: Navigate to the Footer Section
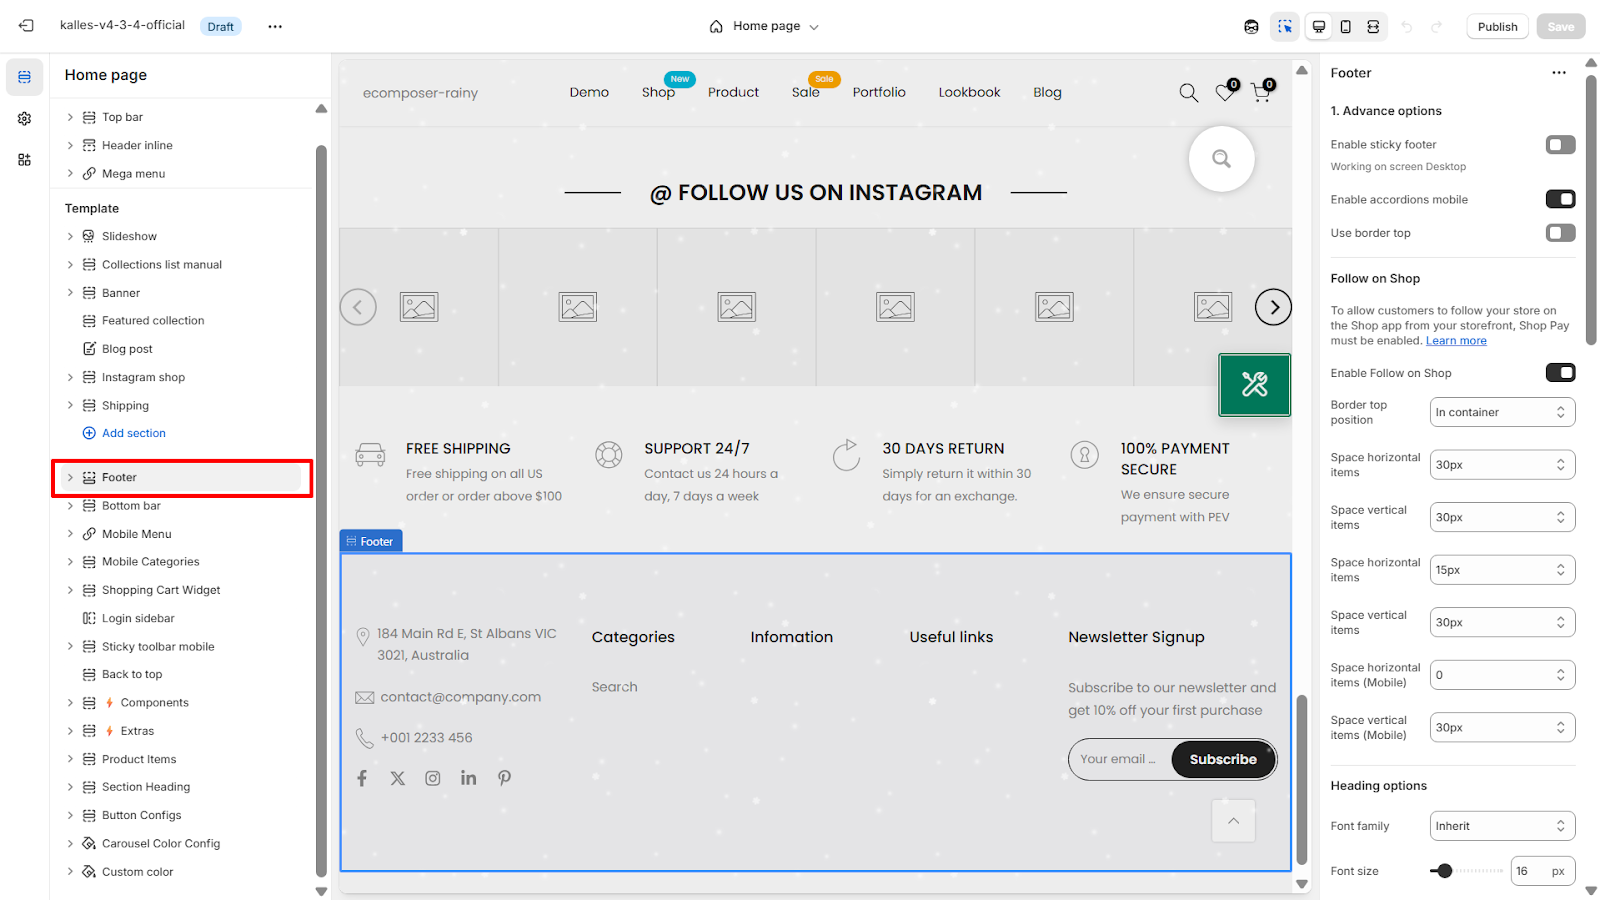
- Scroll down to Footer in the theme editor's left-hand sidebar.
- Click it to open the footer settings panel.
Step 3: Edit Footer Content Blocks
Most themes, including Kalles, let you add and rearrange blocks such as:
- Text columns (e.g., About Us, Contact, etc.)
- Menu links (select a menu you’ve created in Shopify)
- Newsletter signup form
- Social media icons
- Image/logo block
- Payment method icons
- Trust badges
Use the drag-and-drop interface to easily reorder or remove blocks.
Step 4: Customize Footer Styling
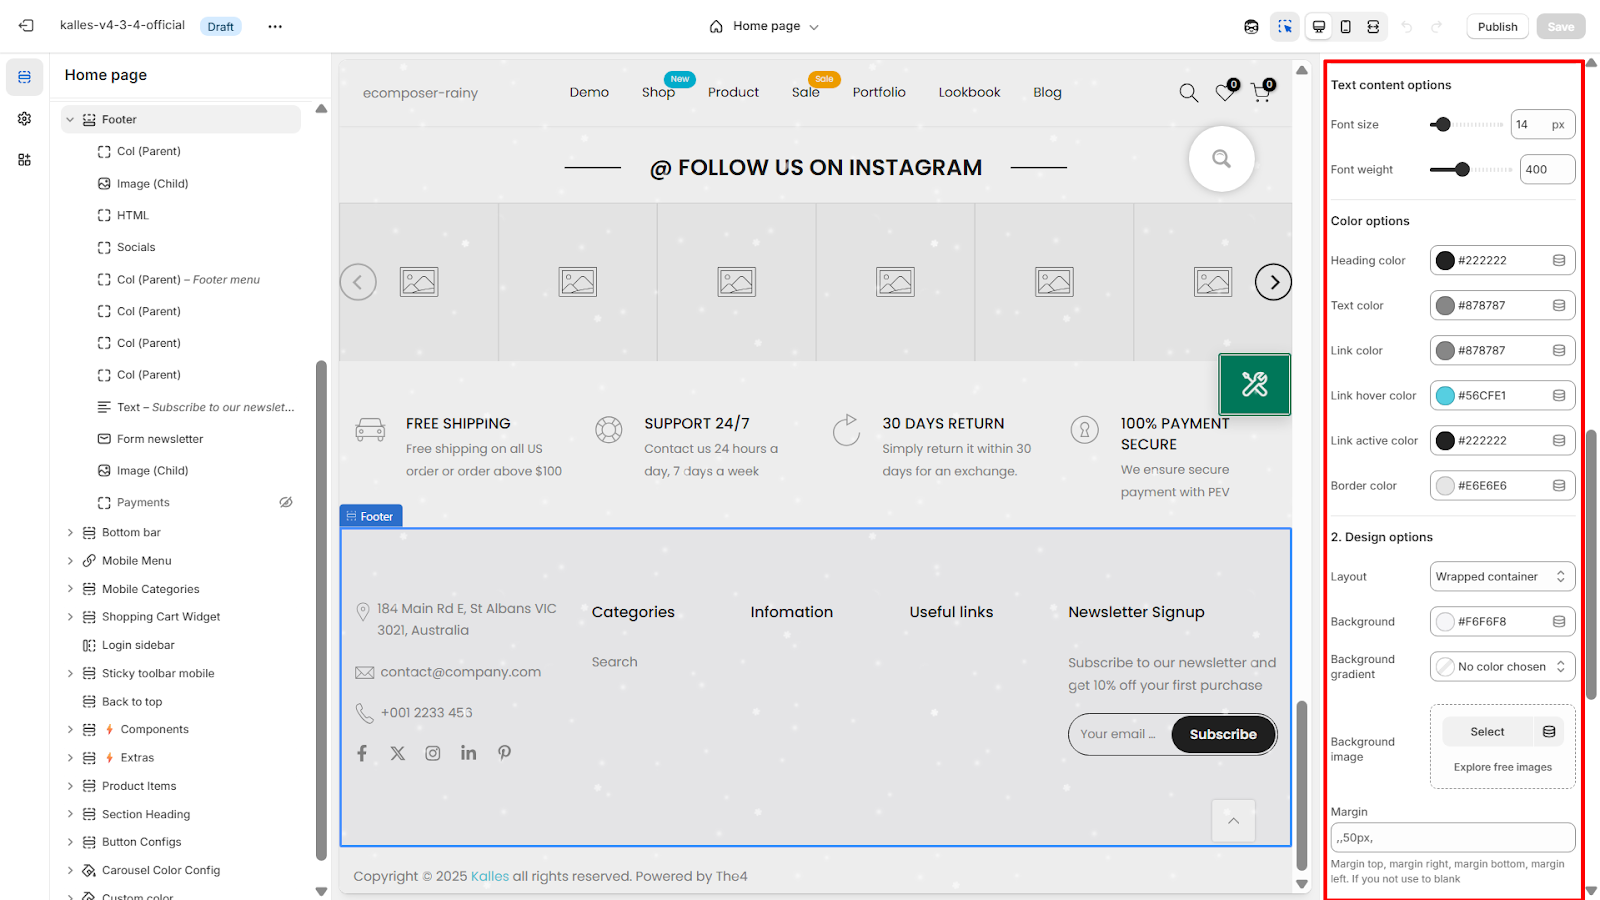
In the same section, you can also:
- Adjust background color, text color, and font
- Choose layout styles (e.g., full width vs. boxed)
- Enable or disable the “Powered by Shopify” line (or leave that for later in the code)
Step 5: Save Your Changes
Once you’re happy with your layout, colors, and content blocks, hit Save in the upper-right corner of the editor.
Advanced Shopify Footer Customization (Edit Code)
In case the theme customizer cannot satisfy your needs or you require more control over the footer of your store and its design, then it is time to work with the code itself. It is especially suited to store owners or theme developers who need to customize the presentation, whether by deleting default content, adding shop-specific content, or coding more sophisticated typography, colors, or other styling unavailable in the theme as is.
Before you dive in, don’t worry if you're not a coding pro. Shopify uses a language called Liquid, which is fairly approachable. Follow these steps carefully, and always back up your theme before making any changes.
Step 1: Access Your Theme Code
- Log in to your Shopify admin.
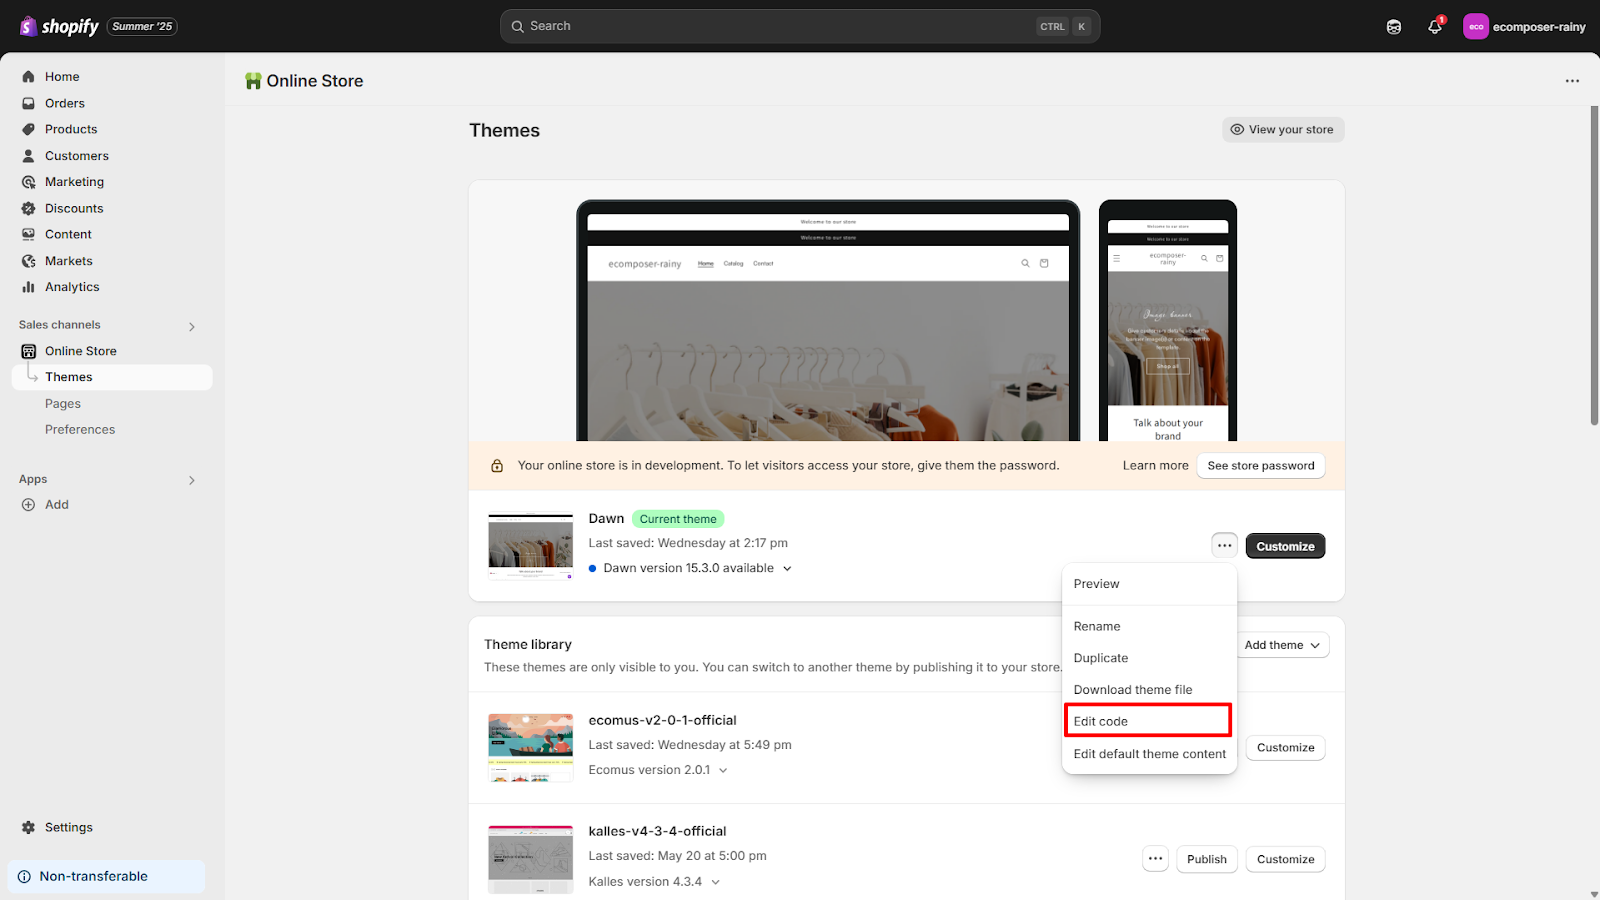
- Go to Online Store > Themes.
- Find your active theme, choose Actions and click Edit Code.
Step 2: Locate the Footer Code File
In the Edit Code panel:
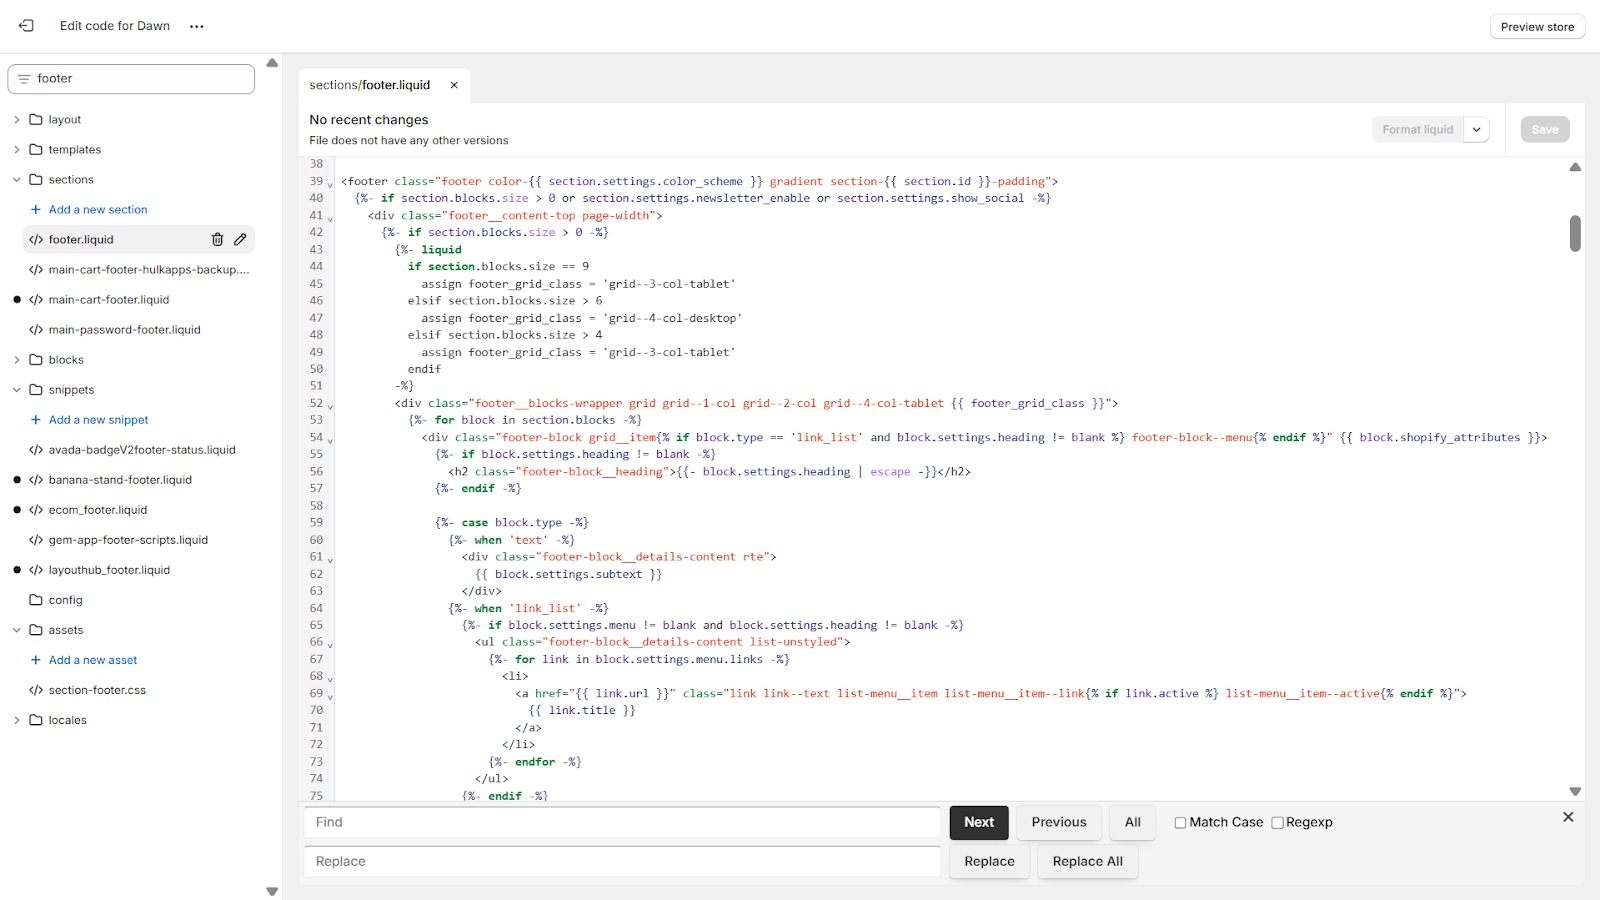
- Go to the Sections folder.
- Open the footer.liquid file — this controls most of the footer’s layout and content.
Step 3: Customize some common sections
- Delete or comment out the “Powered by Shopify” text by wrapping it like so:
|
{%- comment -%} {{ powered_by_link }} {%- endcomment -%} |
- Add Custom Content (HTML or Liquid): Simply add HTML or Liquid code where you want the content to appear in footer.liquid.
|
<div class="custom-footer-note"> <p>We plant a tree for every order 🌱</p> </div> |
- Insert Custom Icons or Images: You can also embed image URLs or add SVG icons directly
|
<img src="{{ 'my-logo.png' | asset_url }}" alt="Brand Logo"> |
Step 4. Style Your Footer with CSS
For visual tweaks (fonts, colors, spacing, etc.):
- Go to the Assets folder.
- Open your CSS file (commonly named theme.css, theme.scss.liquid, or similar).
- Add custom styles, for example:
|
.custom-footer-note { text-align: center; font-size: 14px; color: #888; margin-top: 20px; } |
Customize Shopify Footer Using App
Editing code is a nightmare but you have nothing to worry about the above as there is a quicker, visual method to create a professional looking footer. As well, there are a few Shopify applications that can assist you in constructing, personalizing, and monitoring the footer of your shop without even writing any code. These tools will be drag-and-drop, easy-to-use and ideal especially to merchants who require freedom of design and not going deep into Liquid files.
EComposer Page Builder is one of the most popular apps and the most elegant choice that involves creating the footer almost effortlessly. EComposer is a next-generation page builder that not only assists you in creating landing pages butalso gives you a chance to create fully custom-made footers with tremendous flexibility and design. This is a guide on how to meet and modify a footer in Shopify Apps (EComposer):
Step 1: Install EComposer from the Shopify App Store

- Find “EComposer Landing Page Builder” in the Shopify App Store.
- Click Add App, then install it in your store.
- Approve permissions to connect EComposer with your Shopify admin.
Step 2: Choose a Footer Template
In your Shopify admin, go to Apps > EComposer.
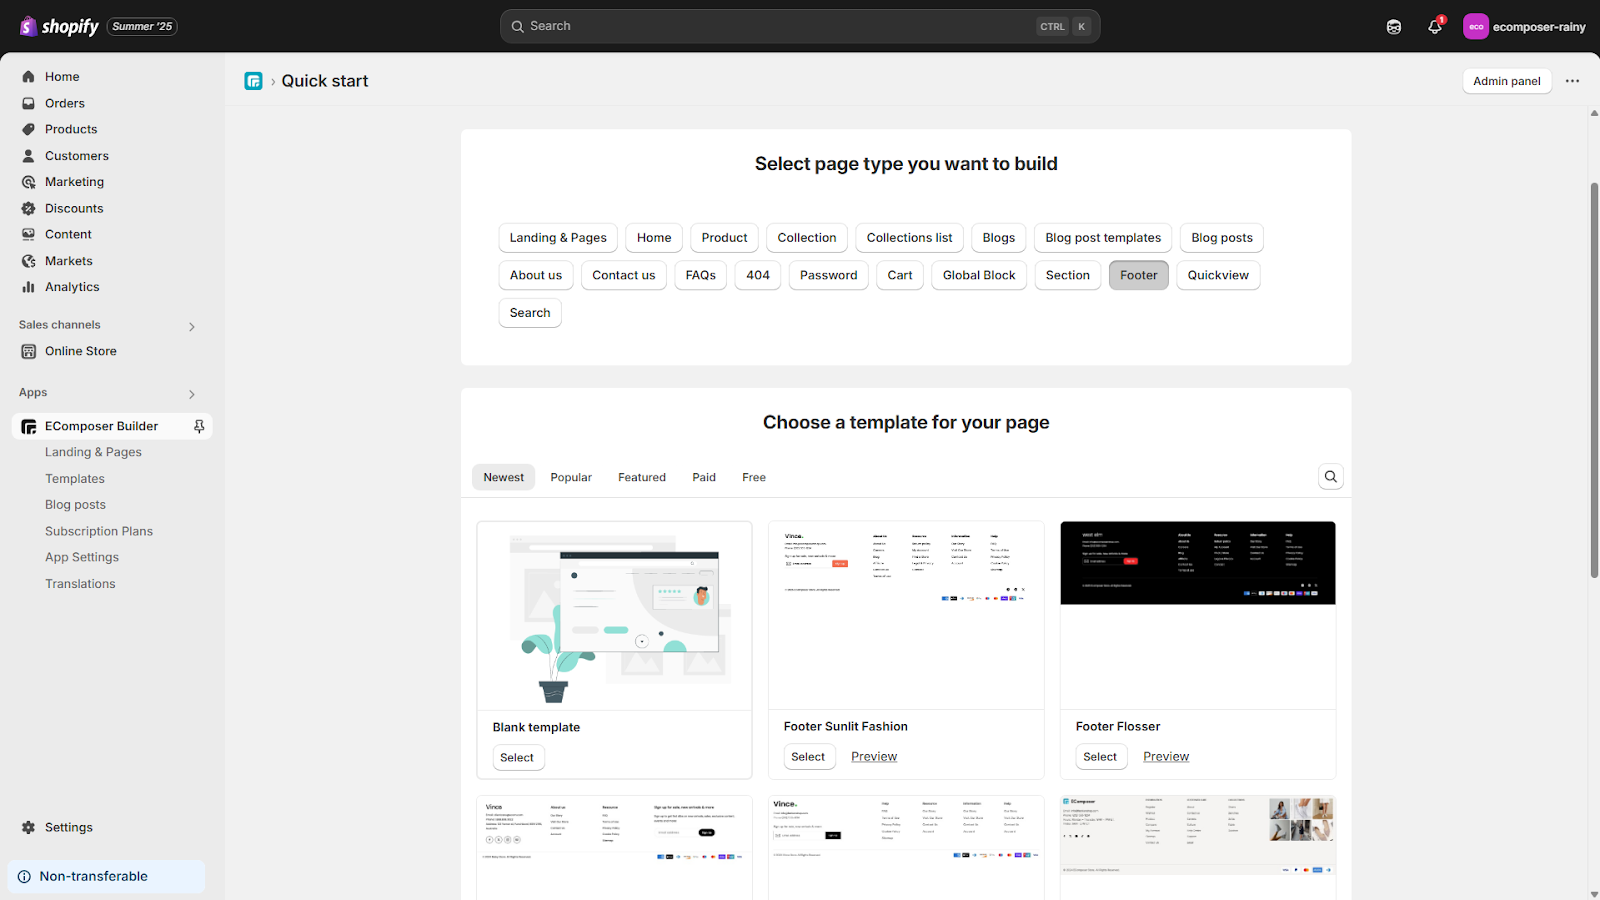
From the App Dashboard, click Actions > Footer.
Click Create Footer to begin building a new one.
You can either:
- Choose from a pre-designed footer template.
- Or start from scratch using drag-and-drop elements.
Use the search bar to browse templates by typing “Footer.” Preview and insert the one that best suits your store’s style.
Step 3: Build Your Footer Visually
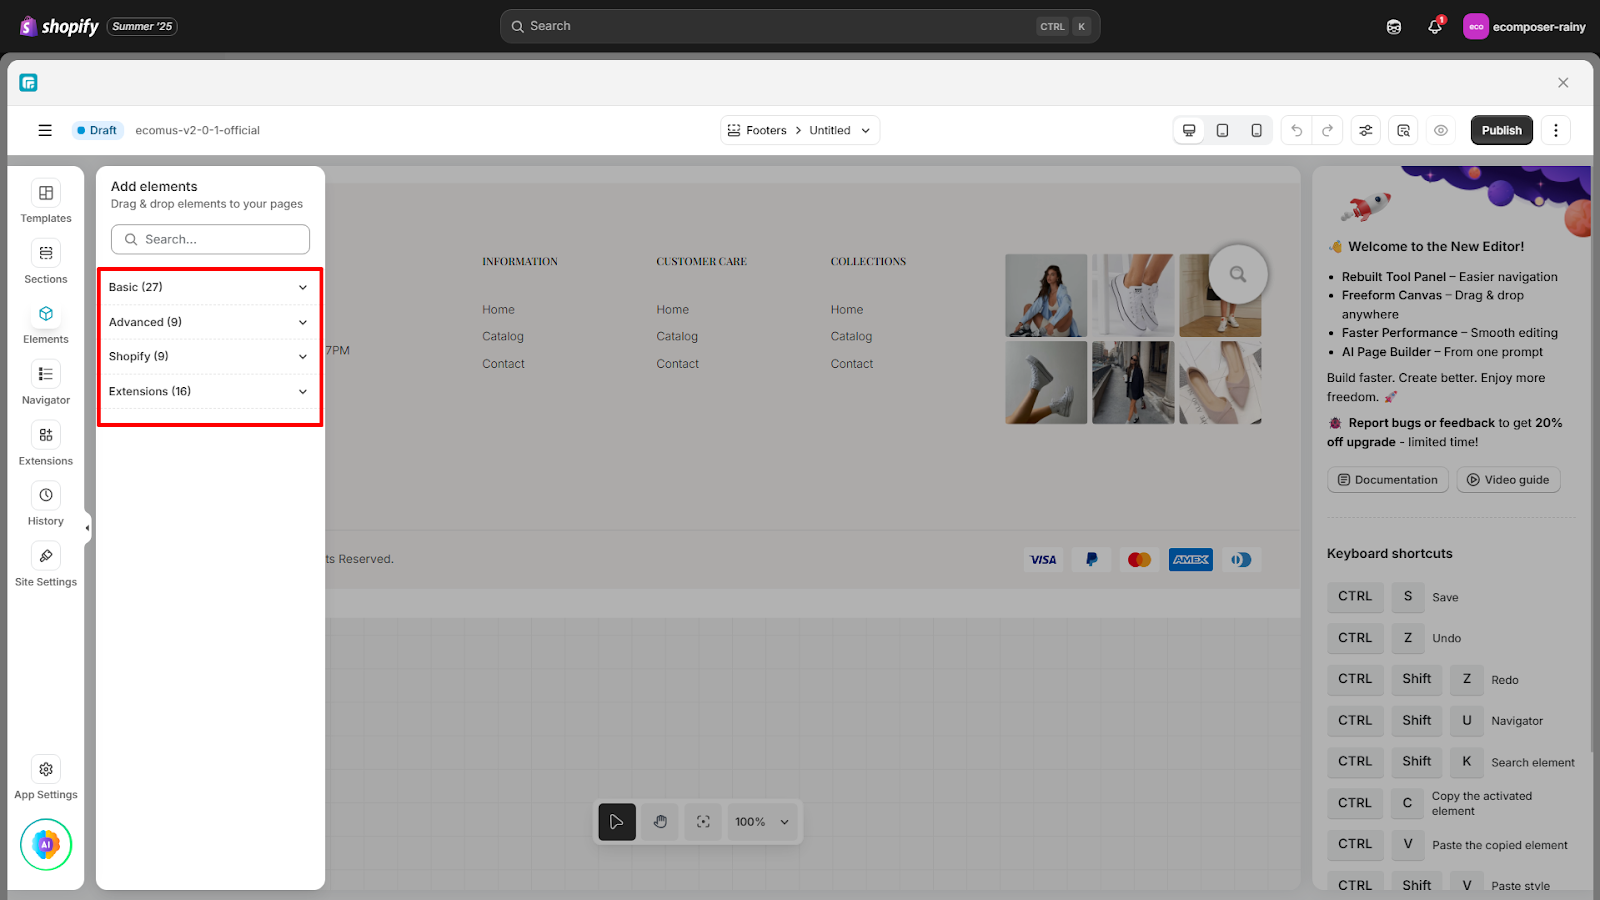
Utilize the drag-and-drop editor to include components such as:
- Menus
- Social icons
- Newsletter signup forms
- Logos
- Background images
Step 4: Add Your Logo
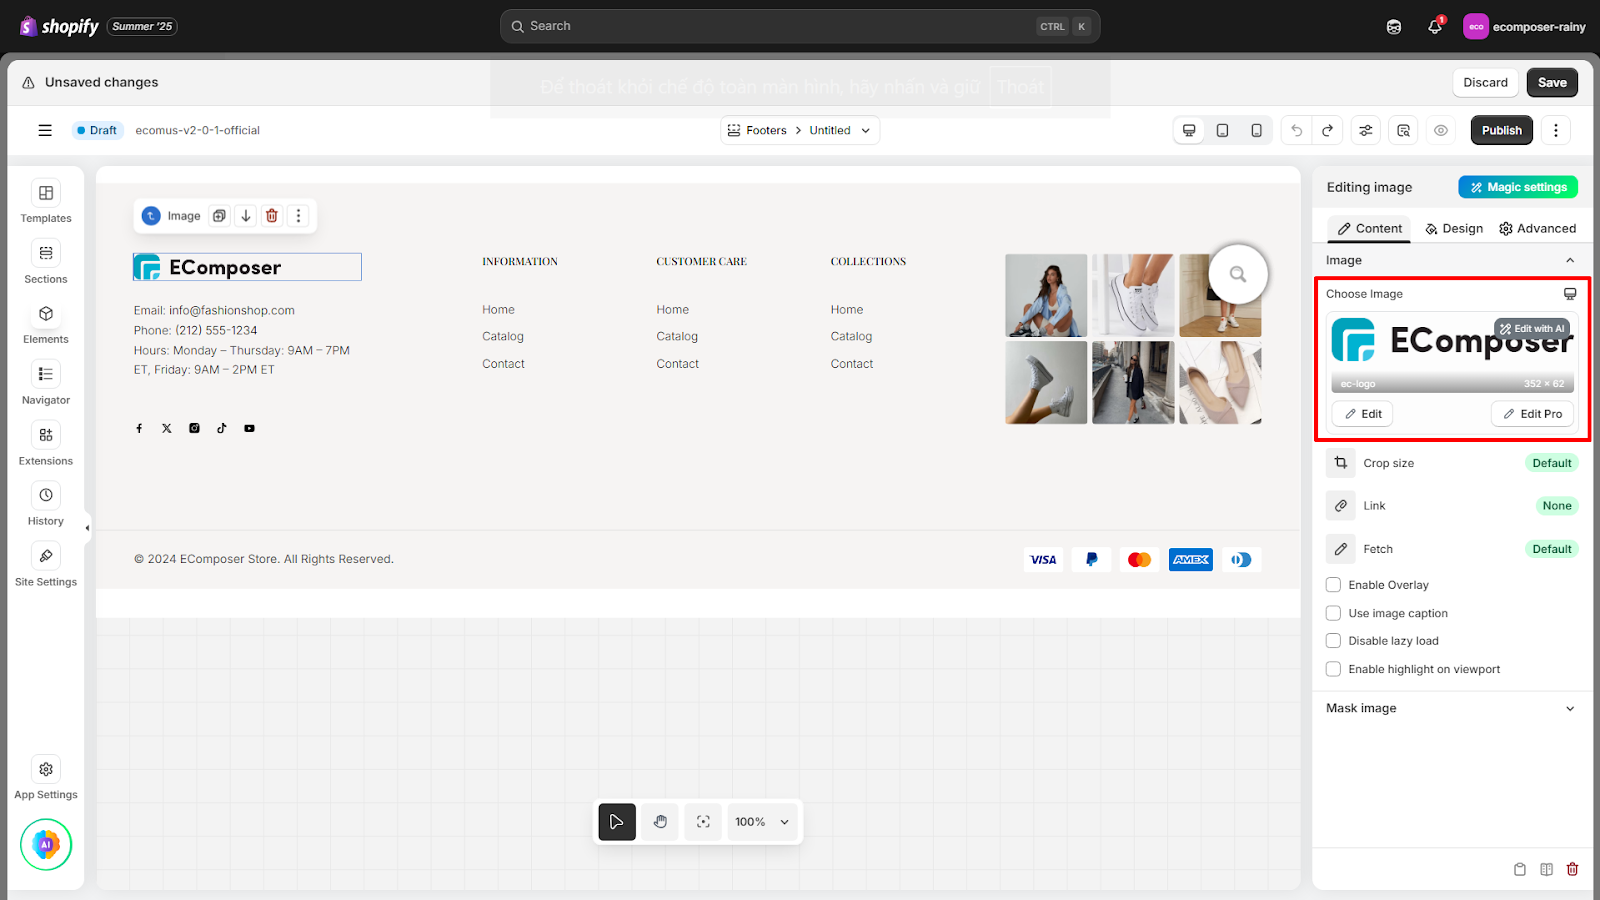
- Click the sample image in your footer layout.
- In the sidebar, click Change under “Choose image” to upload your logo.
- Alternatively, use the Advanced Image element if there’s no logo placeholder in your template.
Step 5: Save and Publish
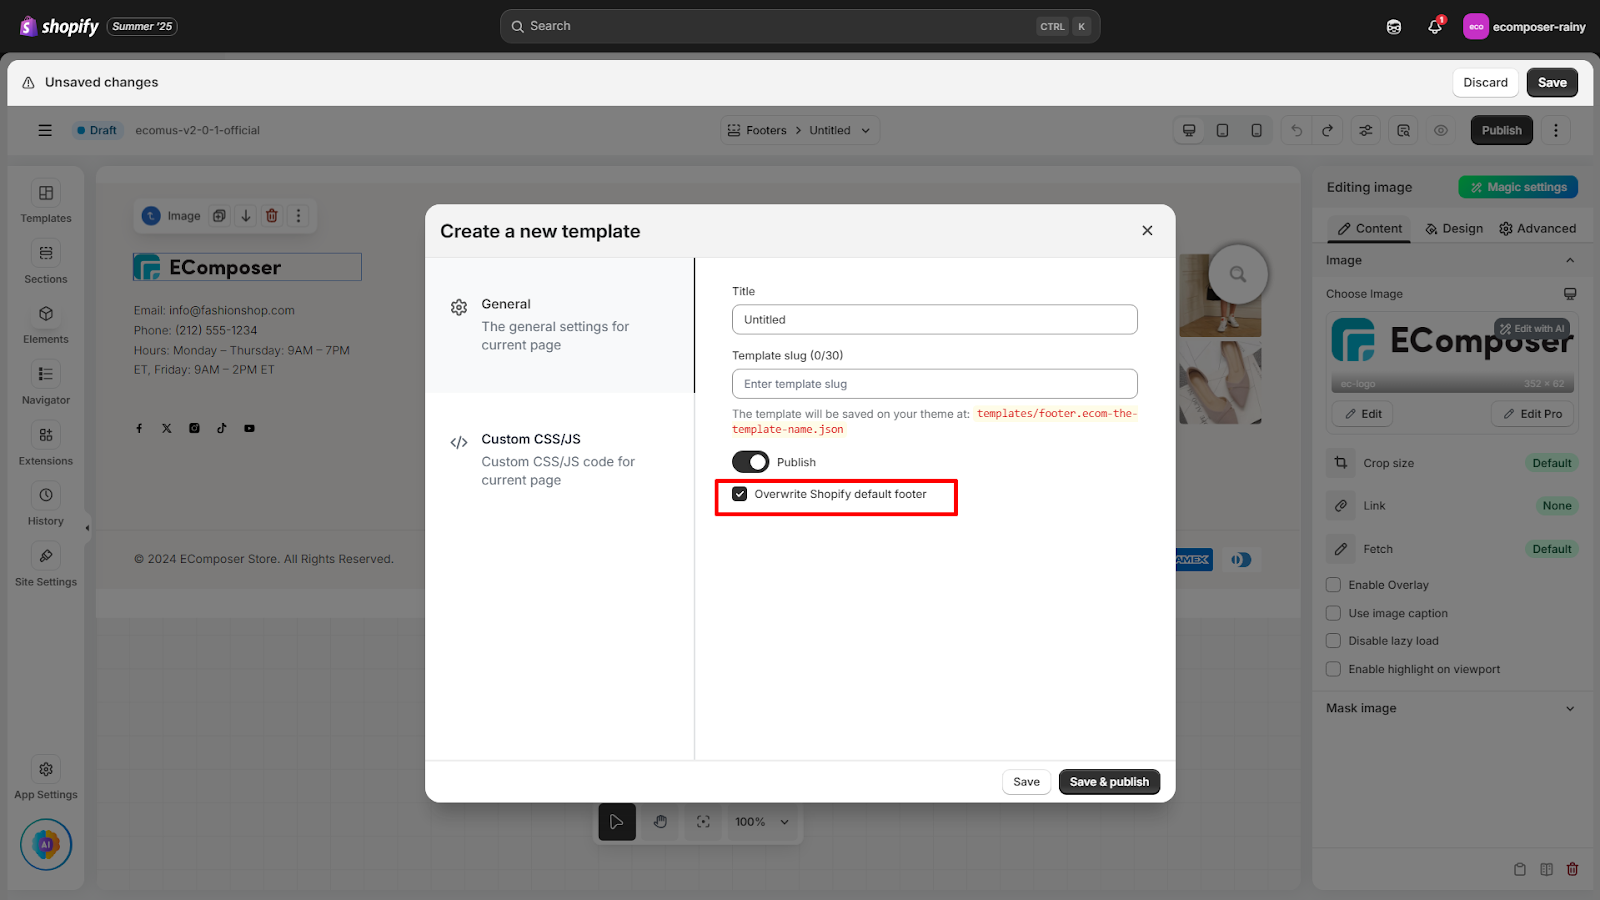
- Once everything looks the way you want, click Publish in the top-right corner.
- Don’t forget to mark as Default and confirm the Save and Publish to apply your footer to all pages of your store.
Best Practices for Shopify Footer Design
Designing a footer might seem like a “set it and forget it” task, but a well-crafted footer can make your Shopify store feel complete, credible, and ready for conversion. Great footers aren’t cluttered or chaotic; they’re purposeful, brand-aligned, and user-friendly across all devices.
Keep It Clean and Uncluttered
Your footer isn’t a storage closet for every link and widget on your site. Avoid stuffing it with unnecessary content. Stick to essential navigation, policies, trust signals, and branding.
✅ Do: Limit to 3–4 content columns.
❌ Don’t: Add every blog tag or product category.
Prioritize the Most Important Links
Think about what visitors actually look for in the footer:
- FAQs
- Returns
- Contact Info
- Terms & Policies
- Social Links
Group related links under clear headers and use a logical structure. A confused footer is a lost conversion.
Stay On-Brand With Design
Make sure your footer matches the overall style of your store:
- Use your brand’s colors, typography, and logo
- Keep link hover styles consistent.
- Match background and text contrast for legibility
A brand-aligned footer helps create a cohesive look that builds trust and reinforces identity.
Design for Mobile First
Footers that look great on desktop but break on mobile are a big no-no. Make sure your footer is responsive:
- Stack columns vertically for small screens
- Use collapsible menus or accordions to save space.
- Avoid wide logos or images that distort on phones.
Pro tip: Preview your footer in Shopify's mobile view before publishing to ensure it displays correctly.
Ensure Good Contrast and Readability
Don't hide important links with low-contrast colors or tiny fonts. Your footer should be easy to read, even in a dimly lit room, on a small screen, or with tired eyes.
- Use at least a 14px font size
- Make sure the text stands out against the background
- Test in light and dark themes, if applicable
Use Recognizable Icons for Trust and Social Proof
Icons are quick visual cues that help users understand and trust your store. Consider using:
- Secure checkout icons (padlock, SSL)
- Payment method icons
- Social media logos
Avoid “Dead Ends”
A footer should never be the end of the user journey. Ensure that every element in the footer links to a useful destination—avoid including placeholder links or broken pages.
✅ Do: Add a contact link or newsletter CTA to re-engage users.
❌ Don’t: Link to "Coming Soon" pages.
Optimize Footer for Mobile Devices (Mobile-First)
With over 70% of eCommerce traffic coming from mobile devices, designing your Shopify footer with a mobile-first mindset isn’t just nice to have; it’s non-negotiable. On a mobile device, a disorganized, unreadable, or faulty footer can irritate customers and result in missed purchases at the point of sale. Optimizing your footer for mobile isn’t just a nice-to-have; it’s a must. Here's how to do it right:
Use a Collapsible or Accordion-Style Footer
Mobile screens are tight on space, and no one likes scrolling through a massive wall of links. Collapsible menus (also called accordion-style menus) allow you to group content under headings like "About," "Help," "Legal," etc. Users can tap to expand what they need. It's clean, tidy, and user-friendly.
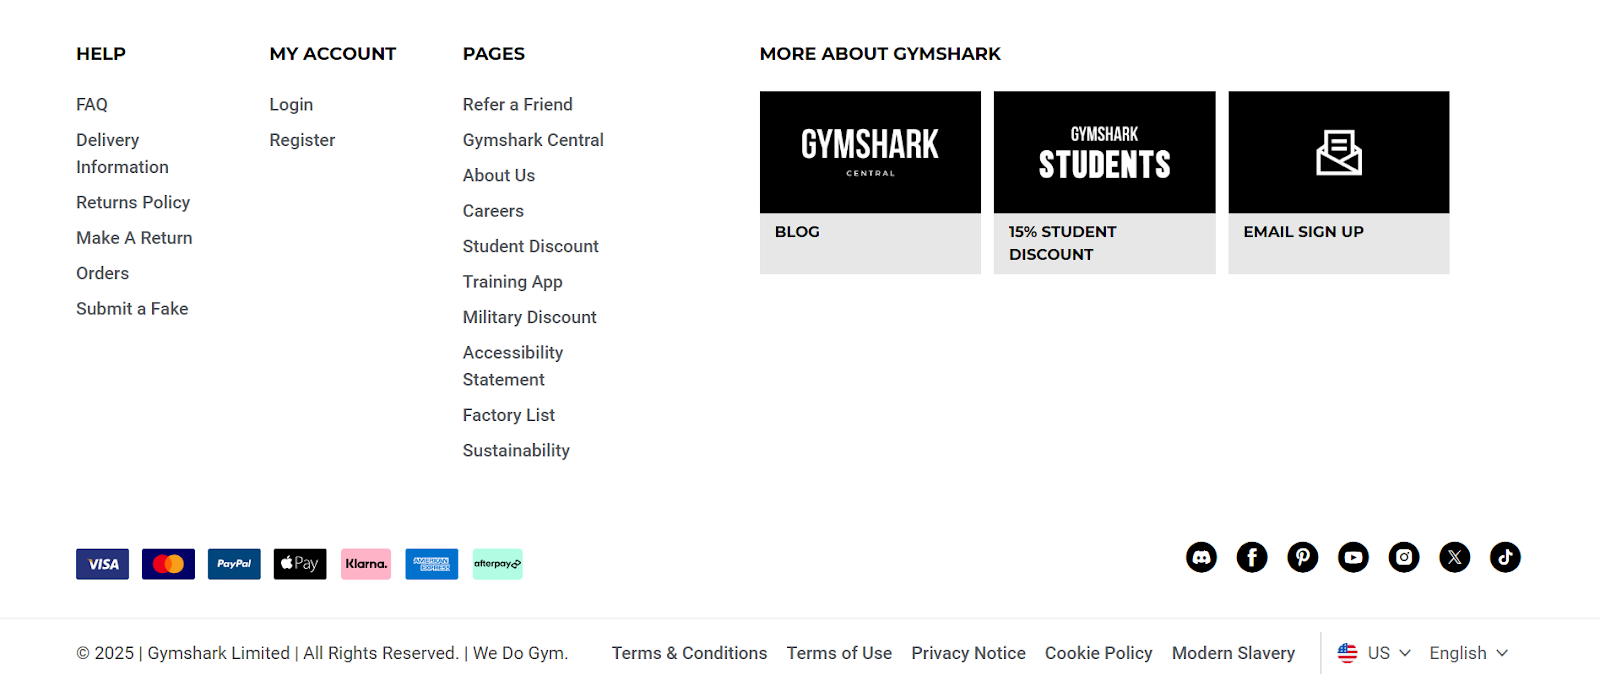
Real-life example: Brands like Gymshark and ASOS utilize collapsible footer menus to maintain a neat and tap-friendly design.
Prioritize Tap Targets
On mobile, fingers replace mice. Ensure that your links, buttons, and icons in the footer are easy to tap, ideally, 48x48 pixels or larger. Small, cramped links are frustrating and can drive users away faster than you can say “unsubscribed.”
Stack Columns Vertically
That nice 4-column footer on desktop? On mobile, it becomes unreadable if not stacked properly. Stack your footer elements vertically so users can read and scroll effortlessly.
Pro tip: Preview your footer on both portrait and landscape modes—some designs break in unexpected ways.
Minimize Content to Essentials
Mobile footers should focus on essential elements only: navigation, contact information, legal links, social media icons, and newsletter signup. Skip the fluff. If it doesn't help your user act or trust you, it can go.
Ensure Readability
Use legible fonts, adequate line spacing, and a high contrast between the text and its background. The footer might be small, but if it’s unreadable in sunlight or low light, you risk missing out on conversions.
Mobile-Friendly Newsletter Signup
If you’re including an email signup in the footer (which is a great idea), ensure the input fields and buttons are responsive and easy to fill out on small screens. Avoid requiring too many fields; just name and email are enough.
Test Responsiveness Across Devices
Don’t stop at one device. Test your footer on:
- iPhone and Android devices
- Tablets (horizontal & vertical)
- Older devices or slow internet (footers often get overlooked here)
Use Shopify’s built-in previewer, browser developer tools (such as Chrome’s mobile simulator), or tools like BrowserStack.
Frequently asked questions
1. How can "Powered by Shopify" be removed?
To remove “Powered by Shopify,” go to Online Store > Themes > Actions > Edit default theme content, search for “powered,” and delete the text from the Footer section. Save changes done!
You can see more at How to Remove the “Powered by Shopify”
2. Can I add a newsletter signup in the footer?
Yes, you can! Most Shopify themes let you add a newsletter signup block directly in the footer via the Theme Editor. Just go to Online Store > Themes > Customize, navigate to the footer section, and add the Newsletter block. Don’t forget to connect it to your email marketing app (such as Shopify Email, Brevo, Klaviyo, etc.).
3. How do I change the copyright year in my footer?
To change the copyright year in your Shopify footer, go to Online Store > Themes > Actions > Edit Code, then open the footer.liquid file. Look for the line with {{ 'now' | date: '%Y' }} and either leave it as is (it auto-updates yearly) or replace it with a static year, such as 2025.
4. Can I have multiple columns in the footer?
Yes, you can have multiple columns in your Shopify footer—most modern themes support 2 to 4 columns by default. Go to Online Store > Themes > Customize, then scroll down to the Footer section. From there, you can add menu blocks, text, social icons, or newsletter signups into separate columns.
5. What if my theme doesn’t let me customize the footer?
If your theme doesn’t let you customize the footer through the Theme Editor, you have two options:
- Edit the footer.liquid code manually by going to Online Store > Themes > Actions > Edit Code
- Use a Shopify app like EComposer, Section Store, or LayoutHub to unlock drag-and-drop footer customization without coding.
Final Thoughts
Your Shopify footer might sit quietly at the bottom of your store, but it holds serious power. A well-designed footer isn’t just a pretty end cap; it’s your chance to guide visitors, build trust, and even boost conversions without being pushy. So don’t let it be an afterthought. Customize your Shopify footer beautifully, and let every scroll to the bottom be a step toward building customer confidence and driving conversions.