


Table Of Content
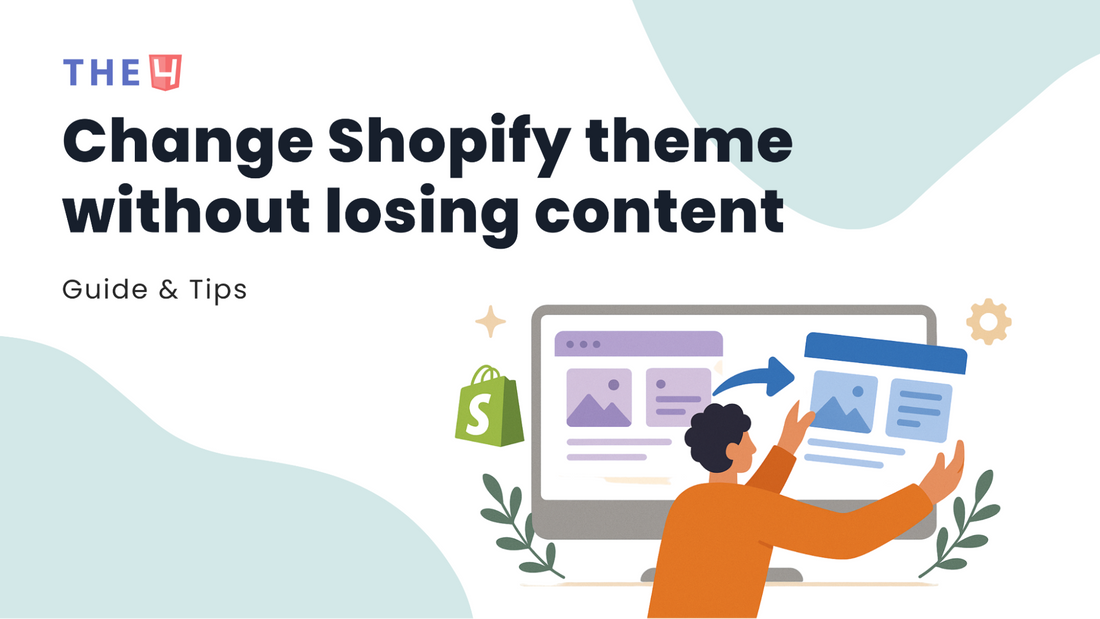
How to Change Your Shopify Theme Without Losing Content (2025 Guide)
To switch your Shopify theme without risking content loss, start by duplicating your current theme. Next, install the new theme from the Shopify Theme Store. Once it’s added, adjust the design to reflect your existing setup, such as fonts, colors, and other style elements, by referencing the duplicated theme or using the theme customization tools. Before making it live, thoroughly test the new theme to confirm that all features work properly and that your content appears as intended.
So, you’ve found it. The perfect new Shopify theme that’s going to transform your store completely. The excitement is real! But then, the biggest fear when changing your store’s design is losing your hard work. You want a new look, but you can’t risk your content, apps, or customizations vanishing.
As a Shopify expert, I’m here to eliminate that worry. This isn’t just another article; this is your definitive, step-by-step playbook. I will personally show you exactly how to change your Shopify theme without losing content. Think of this as your complete, stress-free Shopify theme migration guide.
Does changing theme cause Shopify store to lose content?
Changing your Shopify theme does not delete your core content - your products, collections, pages, and blog posts are securely stored in the Shopify admin, independent of the theme itself., separate from the theme itself. What may not carry over are the customizations you added to the old theme, such as custom code, layout adjustments, or styling tweaks, which you’ll need to reapply in the new theme.
The short answer that should let you breathe a huge sigh of relief is: No.
To make this super clear, think of your Shopify store like this:
- Your Content is the Foundation & Structure: Your products, text, and data are the permanent foundation, walls, and wiring of your house. They are part of the core Shopify platform.
- Your Theme is the Interior Decoration: The theme is the paint on the walls, the style of the furniture, and where you hang the pictures. It’s the visual layer that makes everything look good.
When you change your Shopify theme, you are not bulldozing the house. You're just bringing in a new interior designer to redecorate. The foundation and structure remain untouched.
Now, let's break down exactly what that means for you.
What Stays Safe (Your Core Business Data)
This is the stuff that's connected directly to your Shopify account, not the theme. It’s the heart of your business, and it’s not going anywhere. This includes:
- Products & Collections: Every product name, description, image, price, and inventory count you've ever entered. All your painstakingly organized collections are safe. We will absolutely preserve product pages and collections.
- Customers & Orders: Your complete history of who has bought from you and what they ordered.
- Content: All of your pages (like your "About Us") and every single blog post you've written. Your navigation menus in the header and footer are also safe.
- Core Settings: Your foundational settings, like payment gateways, shipping zones, tax information, and your domain name.
What's Tied to Your Theme (The Stuff You'll Rebuild)
This is the crucial part to understand. While your content is safe, its presentation is controlled by the theme you use. This is the "redecorating" part of the job. Here’s what you’ll need to set up again in your new theme:
- Visual Layouts & Sections: The specific arrangement of your homepage, the image banners, featured collections, and testimonial blocks, is a feature of your old theme. You'll get to rebuild this, often with even better options, in your new theme.
- Theme Settings: Remember going into the theme editor and choosing your brand colors, fonts, and social media links? Those choices are saved in a file within your old theme (specifically, the settings_data.json file). Your new theme will have its own set of Shopify theme editor settings for you to configure.
- Custom Code: If you or a developer ever dove into the code to make a special tweak, some unique CSS, or a change to the theme.liquid file, that code lives inside the old theme's files. It's a key part of any Shopify store customization, and it won't transfer automatically.
- App Integrations: While your apps are safe, how they appear on your site is often theme-dependent. A product review widget, for example, might have been coded to appear in a specific spot in your old theme. Ensuring app compatibility with the new theme means you may need to reposition or re-enable these visual elements.
Your 5-Step Pre Shopify Theme Change Checklist

Before switching your Shopify theme, take time to prepare so the transition goes smoothly and your customers enjoy a consistent experience. Be sure to back up your current theme, note any custom code or third-party apps, gather customer feedback, study competitor designs, plan out your content and page structure, define your design preferences, and select a theme that supports your brand identity and business goals.
Let's walk through each action together.
Step 1: Create a Bulletproof Backup of Your Current Theme
This is your safety net, your ultimate "undo" button. If anything goes sideways or you simply change your mind, this step allows you to restore your store to its current state in a matter of seconds. This is non-negotiable.
Duplicate Your Live Theme.

- From your Shopify Admin, navigate to Online Store > Themes.
- You'll see your current live theme at the top. Click the three-dot icon (the ... Actions menu) next to its name.
- Select Duplicate from the dropdown menu. Shopify will begin creating an exact copy.
- Once finished, you'll see the copy appear below in your Theme library. I strongly recommend renaming it immediately. Click the ... Actions menu on the copy and select Rename. Change its name to something crystal clear, like "Live Theme Backup - August 30, 2025". Now you know exactly what it is and when you saved it. This is the easiest way to create a Shopify theme backup.
Download the Theme Files.
For an extra layer of offline security, let's download that backup to your computer.

- On the renamed backup theme you just created, click the ... Actions menu again.
- Select the Download theme file. Shopify will prepare a .zip file and email a download link to you, the store owner. This gives you a complete copy of your theme's code and assets that live outside of Shopify entirely.
Step 2: Conduct a Full App and Custom Code Audit
Your store's magic often lies in the apps and custom tweaks you've added over time. We need to create a record of these so we can re-implement them in the new theme. This is the key to being able to update your Shopify theme without losing customizations.
List Your Storefront Apps.
Go to the Apps section in your Shopify admin. Look through the list and make a simple note of any app that changes your store's appearance. Think: product review widgets, pop-up forms, announcement banners, mega menu builders, or currency converters. This list will be your guide for testing app compatibility with the new theme.
Hunt for Custom Code.
Did you ever pay a developer for a small tweak or paste a code snippet you found online? We need to find those.

- Go to Online Store > Themes and click the ... Actions menu on your backup theme, then select Edit code.
- The most common place for added code is the theme.liquid file (under the Layout folder). Look for things like Google Analytics, Meta Pixel, Hotjar, or other tracking scripts. Copy any custom scripts you find into a safe document.
- Also, check the Theme settings in the regular theme editor. Many themes have a "Custom CSS" or "Custom JavaScript" box. Copy anything you've added there.
Step 3: Safeguard Your Precious SEO Rankings
You’ve worked hard for your Google rankings; let's make sure they stay put. The big question is always "how to switch Shopify theme without affecting SEO?" This is how we do it.
-
Manually Record Key Pages.
No need for fancy tools if you're just starting. Open a simple spreadsheet. List your 5-10 most important pages (your homepage, top 3 collections, top 3 products). For each URL, copy and paste the current Meta Title and Meta Description. This gives you a "before" snapshot to compare against the "after." -
Crawl Your Site (For Power Users).
If you have a larger store, using a tool like Screaming Frog (which has a free version for up to 500 URLs) can give you a complete list of every single page on your site. This is the professional's way to get a full picture and ensure you avoid losing SEO and traffic.
Step 4: Set Up Your Safe Testing Environment
Now for the exciting part! Let’s get the new theme ready without touching your live store.
Install, Don't Publish.

- Find the new theme you love in the Shopify Theme Store and click Try theme, or if you bought it elsewhere, go to your Theme library and click Import theme > Upload zip file.
- Shopify will install it. This is the crucial moment: do not click Publish.
- The new, un-customized theme will now sit quietly and safely in your Theme library, below your live theme.
Explore top-selling Shopify themes for your store:
- Top Shopify eCommerce Themes
- Highest Converting Shopify Themes
- Best Shopify Themes on Theme Forest
- Best Shopify Mobile Optimized Themes
- Most Popular Shopify Themes for eCommerce
You have now successfully created a safe space. You can click the Customize button next to this new theme to enter the Shopify theme editor. Here, you can play with colors, fonts, layouts, and set up your homepage exactly how you want it, all while your customers shop on your live site, completely unaware. This is how you test a Shopify theme in preview mode, and it's the safest way to prepare for your launch.
Alright, you've done the prep work. Your backups are secure, your checklist is in hand, and your new theme is sitting unpublished in your Theme library, ready for its glow-up. Now comes the exciting part.
Step by step guide to change your Shopify theme safely
To safely update your Shopify theme, go to Online Store > Themes in your admin dashboard. From there, you can add a new theme by choosing and adding it from the Shopify Theme Store or uploading a ZIP file. Customize its design and settings to match your brand, and test it carefully to confirm that all links, features, and pages function as expected. Before publishing, duplicate your existing theme and record any custom code edits so you can easily revert if necessary.
This is the official, step-by-step guide to changing your Shopify theme. We'll move carefully, check our work, and ensure everything is perfect before we reveal the new design to the world.
Step 1: Customize Your New Theme in Preview Mode
This is your creative sandbox. Your live store is still running perfectly on the old theme, so you can take your time here and get things exactly right without any pressure.

1. In your Shopify admin dashboard, navigate to Online Store > Themes to access the Theme Editor. Scroll down to your Theme library and find your new theme. Click the Customize button. This will launch the Shopify theme editor, a safe environment where your changes won't affect your live store.
2. Rebuild Your Visuals: Have a browser tab open with the front end of your live store. Use it as a reference, not a rulebook. Your goal isn't to make the new theme look exactly like the old one but to translate your brand's style into the new, better framework.
- Homepage: Rebuild your homepage sections. Add your image banners, featured collections, and testimonials. You might discover your new theme has even better sections to choose from!
- Colors & Fonts: Go into the Theme settings (usually a gear icon in the editor) and set up your brand's color palette and typography.
- Header & Footer: Configure your navigation menus, announcement bar, and social media links on your header & footer.
This is your chance to embrace the new features that made you choose this theme in the first place. Learn more easy Steps to Build a Website on Shopify here.
Step 2: Carefully Re-Integrate Your Code and Apps
Remember that list of apps and custom code snippets we made? It's time to put it to use. This is a critical step in our Shopify theme migration guide.
1. Migrate Custom Code: Carefully copy and paste the tracking scripts (like Google Analytics or Meta Pixel) that you saved from your old theme. The best place is often in the new theme's code editor (Actions > Edit code > theme.liquid) or a dedicated "custom code" section in the theme settings. A proper liquid code migration ensures your analytics and ads continue to work seamlessly.
2. Re-enable Your Apps: Many modern Shopify Online Store 2.0 themes make this incredibly easy. In the theme editor, you can often add apps as "blocks" directly within sections. Go through your app list. Do your product reviews show up? Does your pop-up form work? Check the app's documentation if you're unsure; most have clear instructions for new theme installations to ensure app compatibility.
Step 3: Conduct a Thorough Final Preview
Before we go live, we need to be our own pickiest customer. We're going to check everything. In the theme editor, or from the Theme library (Actions > Preview), view your store as a visitor would.
Simulate the Full Customer Journey:
- Land on the homepage. Does it look right?
- Click through your navigation menu. Do all the links work?
- Visit a collection page.
- Click on a product. Is all the information there? Are the images clear?
- Add a product to the cart.
- Go through the entire checkout process right up to the final payment step. (You can use Shopify's Bogus Gateway to place a test order without spending real money.)
Test on Multiple Devices: Your store must look perfect on both desktop and mobile. In the theme editor, use the icons at the top-right to switch between Desktop and Mobile views. Open the preview link on your smartphone.
Check Different Browsers: Briefly check how the site looks on different browsers like Chrome, Safari, and Firefox to catch any weird glitches.
Don't rush this step! This Quality Assurance (QA) check is what separates a stressful launch from a smooth one.
Step 4: Go Live! Publish Your New Theme
The moment has arrived. You’ve customized, you’ve migrated, and you’ve tested everything. You are confident and ready.
1. Go back to Online Store > Themes.
2. Find your beautiful new theme in the Theme library.
3. Ready? Click Publish to make it live.
4. Shopify will give you one final confirmation pop-up. Click Publish again.
And that's it! Your new theme is now live for the world to see. Your old theme is deactivated and safely stored in your Theme library, ready to be reactivated in an emergency, giving you a way to revert to the old Shopify theme if needed.
Congratulations, you just successfully managed your Shopify theme update
What to Do After Publishing a New Theme
Once your new theme is live, keep an eye on its performance and collect feedback from customers. Be prepared to switch back if problems arise. Shopify automatically stores your previous theme in the theme library, allowing you to republish it at any time. Also, review your site for any missing code customizations and promptly resolve reported issues to maintain a seamless shopping experience.

4.1. Immediate Health Check (First 24 Hours)
- Prompt Google: Submit your sitemap in Google Search Console to get your new theme indexed faster.
- Verify Trackers: Check Google Analytics' Real-time report to confirm your visit is being tracked. Ensure your Meta Pixel is firing correctly.
- Place a Live Test Order: This is non-negotiable. Use your credit card to complete a real purchase. It’s the only way to be 100% sure your checkout, payment, and email notifications are working perfectly. Refund it right after.
- Hunt for Broken Links: Click through your main navigation and footer. Ensure all key links work and lead to the right place.
4.2. Preserving and Improving SEO Performance
- Check Key Pages: Quickly verify that the meta titles and descriptions on your homepage and top product pages are correct.
- Monitor for Errors: Monitor your site using Google Search Console for any new crawl errors or indexing issues that pop up after the switch.
- Set Up Redirects (If Needed): If any of your main URLs changed with the new theme, immediately set up 301 redirects from the old URLs to the new ones to preserve your SEO authority.
4.3. Pivot to Conversion and Growth
With a stable site, it's time to leverage your new investment.
- Test Your Speed: Run your site through Google PageSpeed Insights. A faster site improves user experience and conversions.
- Master the Mobile Experience: Don't just check if it works on mobile - use it. Is the journey from landing page to checkout absolutely seamless on a smartphone?
- Activate New Features: You paid for this theme's bells and whistles - use them! Explore and enable features like advanced filters, trust badges, or quick-buy buttons that you didn't have before. This is how you turn a new design into more sales.
Congratulations, your new theme is live! But don't close the book just yet. A few final checks will ensure your launch is not just smooth, but a powerful upgrade for your business. Here’s your concise action plan.
Troubleshooting Common Pitfalls after changing your Shopify theme

Some frequent problems after switching a Shopify theme include malfunctioning features caused by custom code or app conflicts, design mismatches or missing elements, slower site speed, and SEO setbacks that can hurt search visibility. Additional pitfalls include forgetting to back up the old theme, overlooking mobile responsiveness, adding unnecessary customizations, and failing to thoroughly test the new theme before making it live.
Problem 1: An App Widget Has Disappeared!
You go to a product page, and your trusted product review app or a special "buy now" button is suddenly missing.
Your Quick Fix: This is the most common post-launch issue, and the fix is usually simple. With modern Shopify Online Store 2.0 themes, many apps work as "blocks" inside the theme editor.
- Go to Online Store > Themes > Customize.
- Navigate to the page where the widget should be (e.g., a product page).
- In the left-hand sidebar, look for an option to "Add block" or "Add section."
- You will likely see your app listed there. Click to add it back in.
- If that doesn't work, a quick visit to the app's settings page within your Shopify admin will often provide a "re-install" or "re-activate" button that injects the code into your new theme for you. This is all part of ensuring app compatibility with the new theme.
Problem 2: My Homepage Banner Looks Stretched or Broken.
An image that looked perfect in your old theme now looks pixelated, stretched, or just plain wrong in the new one.
Your Quick Fix: This isn't a case of lost content but of different display requirements. Your new theme likely has different recommended dimensions for that specific image section.
- In the theme editor, go to the section with the broken image and remove it.
- Look for any text that recommends a specific image size (e.g., "1800 x 1000px recommended").
- Re-upload the original, high-quality image directly into the new theme's editor. The theme will then format it correctly. Think of it as putting the right-sized photo into a new picture frame.
Problem 3: My Traffic or Sales Took a Sudden Dip.
This is the one that causes the most anxiety, but it's almost always traceable and fixable. If you notice a sudden drop, act like a detective.
Your Quick Fix: Your first stop is your data dashboard.
- Immediately open Google Search Console. Look under the "Pages" report for any new crawl errors. Google will tell you exactly which pages it's suddenly having trouble finding. This is the fastest way to diagnose how to avoid losing SEO and traffic.
- The most likely culprit is a URL that changed without a proper 301 redirect. If you discover a key page has a new URL, use a free app from the Shopify App Store to create a redirect from the old link to the new one.
- As a last resort, remember your ultimate safety net: your backup. If you're truly stuck and need more time to figure things out, you can always revert to your old Shopify theme by simply publishing the backup you made in Part 2. This gives you a stable site while you troubleshoot the new theme in preview mode again.
Bottom line
And there you have it. You now know exactly how to change your Shopify theme without losing content. We’ve replaced that initial fear with a clear, actionable plan, from the critical backup checklist to the final post-launch checks.
You aren’t just changing a design; you’re unlocking new potential and improving your customers' experience. Go on and confidently give your store the powerful, fresh new look it deserves. You’ve absolutely got this.
FAQs - How to change Shopify theme without losing content
1. When and why should I change my Shopify theme?
You should consider a change when your current theme feels slow, looks dated, is missing key features (like better filtering or video support), isn't performing well on mobile, or simply no longer reflects your brand's style. The "why" is always to improve the customer experience, boost your site speed, and ultimately, increase your conversion rate.
2. How long does it take to change a Shopify theme?
It varies! For a simple store with minimal apps and customizations, you could complete the entire process in just a few hours. For a larger, more complex store with custom code and many apps, it's wise to set aside a few days to carefully handle the Shopify theme migration guide and conduct thorough testing.
3. Will I lose my product reviews when I switch themes?
No, you won't. Your product reviews are stored by your reviews app (like Shopify's own "Product Reviews," Judge.me, or Loox), not within the theme itself. You'll ensure the app's display widget is enabled in the new theme, which is usually a quick toggle in the theme editor.
4. Is it really worth upgrading to an Online Store 2.0 theme?
100% yes. The upgrade to an OS 2.0 theme is one of the best investments you can make in your store. The flexibility of "sections everywhere" (allowing you to customize any page, not just the homepage), combined with significant improvements in site speed and performance, is a total game-changer.
5. Does changing the theme affect SEO?
It can, which is why our pre-launch checklist is so critical. A new theme can change your site speed (often for the better!), your heading structure, and sometimes even your URL patterns. By following the steps to safeguard your SEO data and checking for errors post-launch, you can not only mitigate any negative impact but also often improve your SEO performance.
6. Can I go back to my old theme if I mess up?
Yes, absolutely! Remember Step 1 of our checklist, where we made a Shopify theme backup? That duplicate copy is your safety net. If you run into major issues, you can revert to the old Shopify theme with a single click by publishing that backup, giving you time to fix the new one without affecting your live sales.
7. Can I hire someone to do this for me?
Of course! And sometimes, it's the smartest move. The Shopify ecosystem is full of talented developers and agencies known as Shopify Experts who specialize in these migrations.
8. When should I consider hiring an expert?
I'd recommend hiring an expert if you find yourself in one of these situations:
- Your store has significant liquid code migration needs or heavy custom code.
- You rely on numerous, complex apps for your store's functionality.
- You simply aren't confident in your technical skills and want guaranteed peace of mind.
- Your time is more valuable when spent on marketing and running your business.
🎁 Exclusive Deals for The4 Customers

EcomRise Post Purchase Upsell
EcomRise Post Purchase Upsell helps merchants boost revenue by offering targeted upsell and cross-sell offers after checkout.
- ✅ Show post purchase upsell offers immediately after checkout
- ✅ Display thank you page upsell offer with discount
- ✅ Track upsell performance easily with GA4 integration

🎉 EComposer – Free 6-Month Plan
Build landing pages, sales funnels, and more with drag & drop.
The4 users get 6 months free (save $114).
- ✅ 100+ templates ready to use
- ✅ Build any Shopify page
- ✅ No coding required
Related Posts

Looking for Shopify 6 Months Trial? Here's the Truth and Current $1/Month Offer

Easy Guide to Merging Multiple Products into One Page on Shopify

Shopify Footer Customization: Edit & Design Beautifully

How To Add Breadcrumbs In Shopify (New Guide 2025)

How To Customize Your Header In Shopify Store

No comments